
Contents
2つのEC2でApacheを動かして、HTTP通信を負荷分散する

今回試す内容は下記の通りです。
・2つのAZ(パブリックサブネット)にEC2を一つずつ配置
・それぞれのEC2でApacheを動かして、index.htmlにはEC2-1aとEC2-1cの文字を記載
・ELBを使って同じURLでEC2-1aとEC2-1cの両方が見える様に設定
つまり同じアドレスにアクセスし、ELBの機能でEC2-1aとEC2-1cに振り分けられる様に設定します。
その状態でEC2-1a側を落としたらどうなるのかを確認します。
※結果は想像できると思いますが。。。
VPCの作成
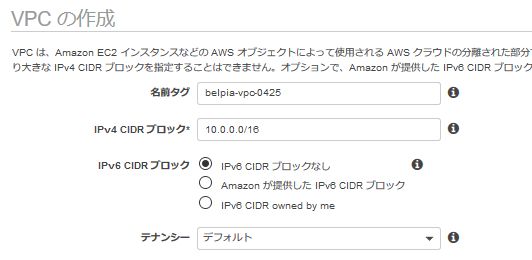
名前はbelpia-vpc-0425、10.0.0.0/16のアドレスで作成します。
サブネットの設定
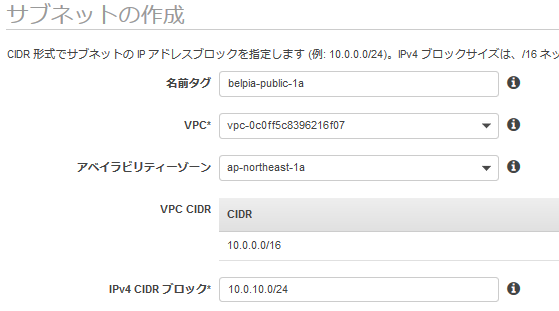
ap-northeast-1a側のサブネットを作成します。
CIDRは10.0.10.0/24にします。
AZはap-northeast-1aを選択します。

ap-northeast-1c側のサブネットを作成します。
CIDRは10.0.20.0/24にします。
AZはap-northeast-1cを選択します。
インターネットゲートウェイの設定
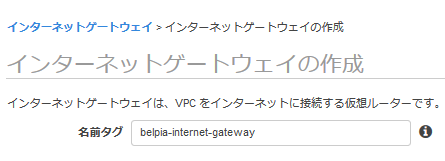
インターネットゲートウェイを作成します。
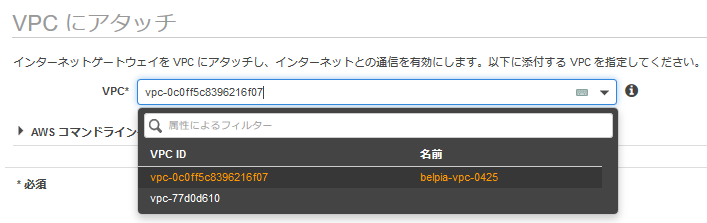
作成したインターネットゲートウェイをbelpia-vpc-0425にアタッチします。
ルートテーブルの設定
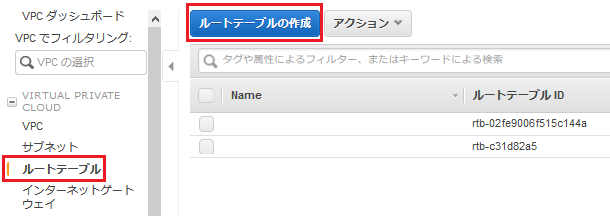
ルートテーブルを作成します。

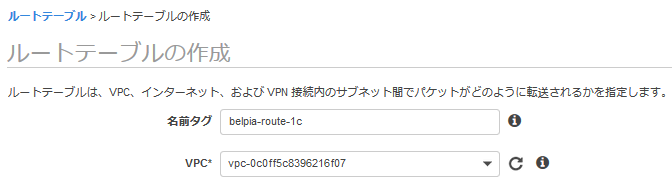
ap-northeast-1a用のルートテーブルを作成します。
belpia-route-1aという名前のルートテーブルをbelpia-vpc-0425に割り当てます。
ap-northeast-1c用のルートテーブルを作成します。
更にbelpia-route-1cという名前のルートテーブルをbelpia-vpc-0425に割り当てます。
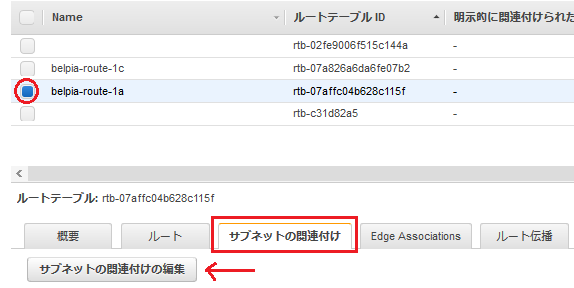
belpia-route-1aのサブネットの関連付けタブを選択して、サブネットの関連付けの編集をクリックします。
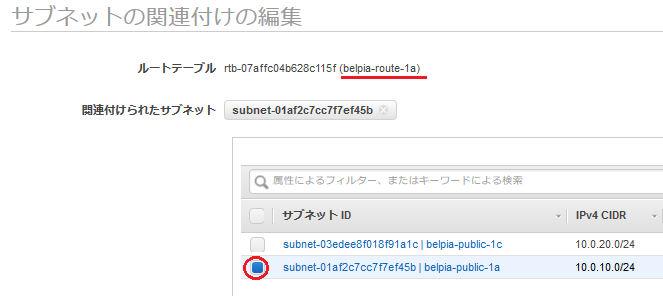
belpia-subnet-1aを関連付けさせます。
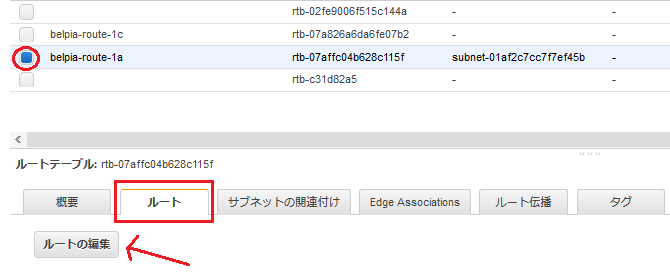
ルートタブを選択して、ルートの編集をクリックします。
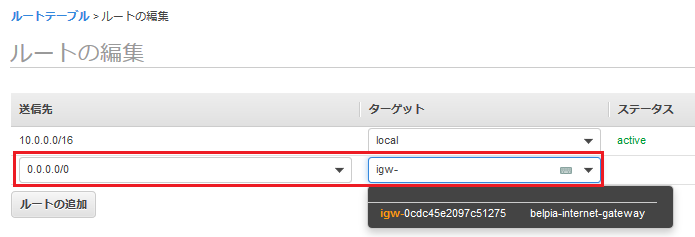
宛先0.0.0.0/0(デフォルトルート)のターゲットを先ほど作成したインターネットゲートウェイのbelpia-internet-gatewayを選択します。
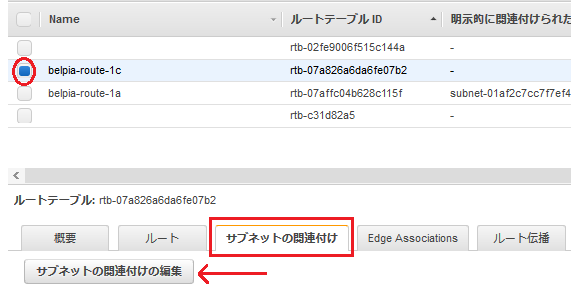
belpia-route-1c側の設定をします。
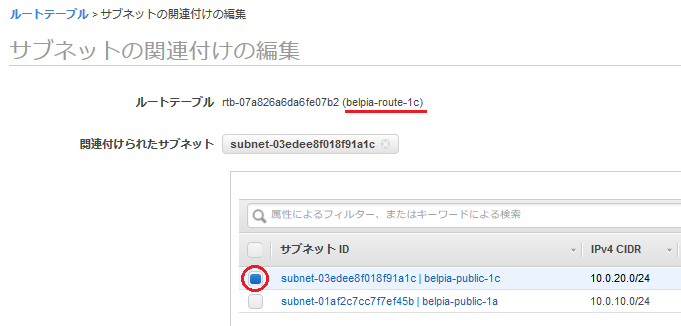
1c同士で関連付けます。
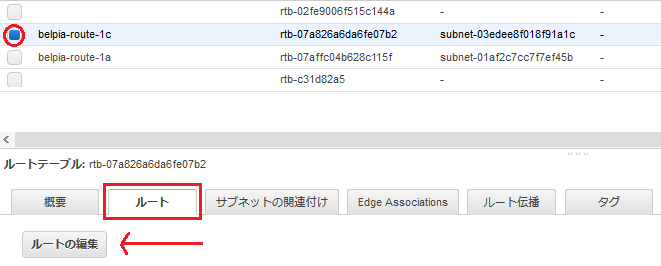
1c側のルートタブでルートの編集をクリックします。
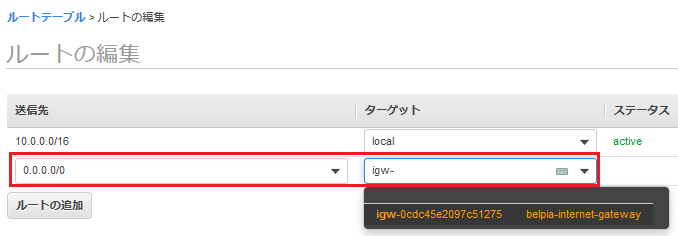
送信先0.0.0.0/0(デフォルトルート)の宛先をインターネットゲートウェイにします。
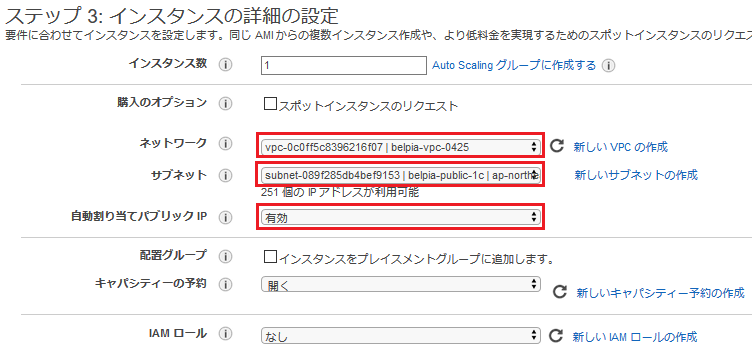
EC2の作成
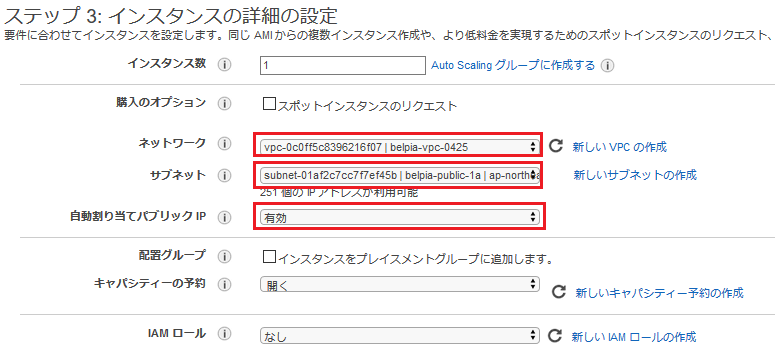
ap-northeast-1aに設置するEC2を作成します。
パブリックIPの自動割り当ても有効にします。

名前をbelpia-ec2-1aにします。
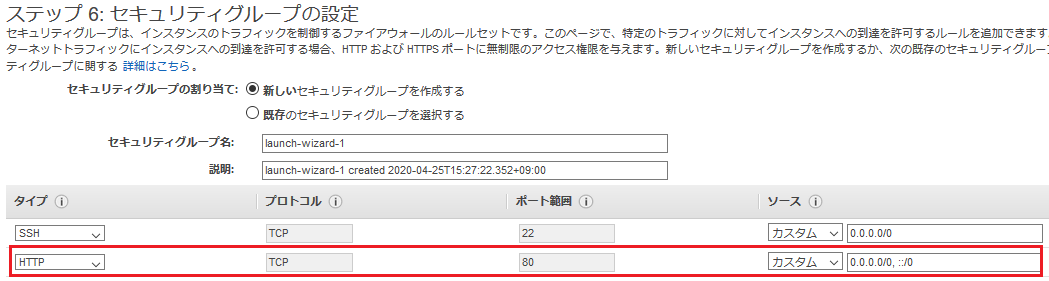
Apacheを動かすのでHTTPアクセスができるようにセキュリティグループを設定します。
ap-northeast-1cに設置するEC2を作成します。
パブリックIPの自動割り当ても有効にします。

名前をbelpia-ec2-1cにします。
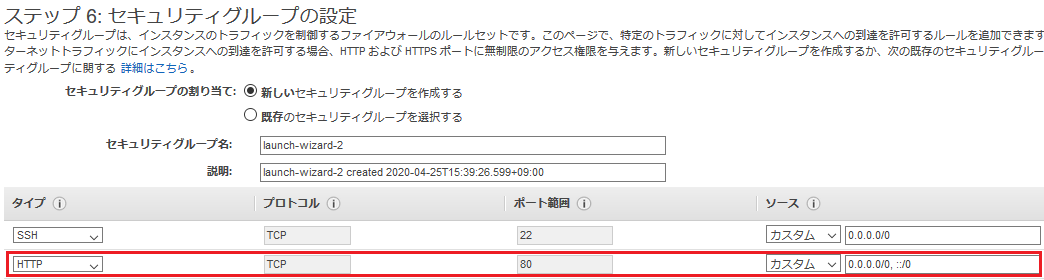
Apacheを動かすのでHTTPアクセスができるようにセキュリティグループを設定します。
EC2にApacheの設定をする
2つのEC2に同じ方法でapacheをインストールして、サービスを起動します。
作成するindex.htmlの中身以外は全て同じ方法で行います。
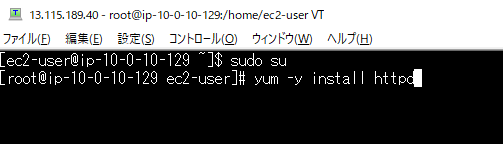
下記のコマンドでApacheをインストールします。
sudo su
yum -y install httpd
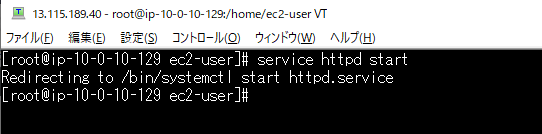
下記のコマンドでapacheのサービスを起動します。
service httpd start
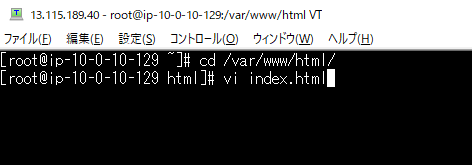
/var/www/htmlに移動して、index.htmlファイルを作成します。
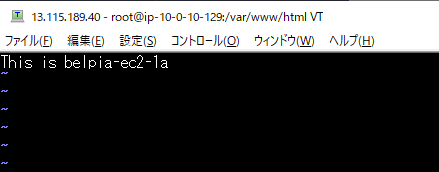
belpia-ec2-1a側では This is belpia-ec2-1aと、
belpia-ec2-1c側では This is belpia-ec2-1c入力して保存します。
※Webサービスを冗長化する場合は通常では同じ内容にしますが、
今回はどちらのサーバにアクセスしているか分かる様にする為にノード名を入れる様にしています。
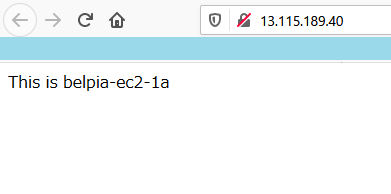
belpia-ec2-1aのパブリックIPをブラウザに入力して、
index.htmlファイルの中身が表示されることを確認します。
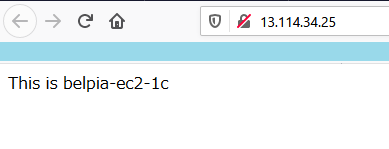
belpia-ec2-1cのパブリックIPをブラウザに入力して、
index.htmlファイルの中身が表示されることを確認します。
ELBの作成
ELBを作成します。
今回は最も基本なALBを使用します。
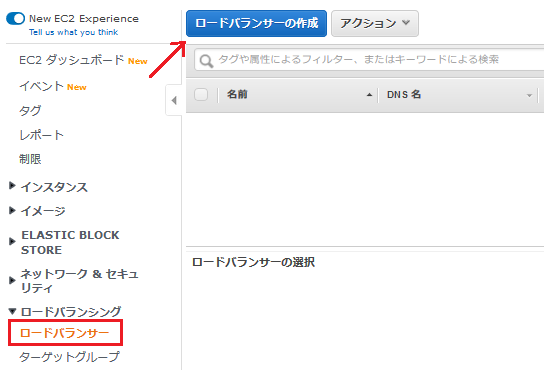
ロードバランサーの画面でロードバランサーの作成ボタンをクリックします。
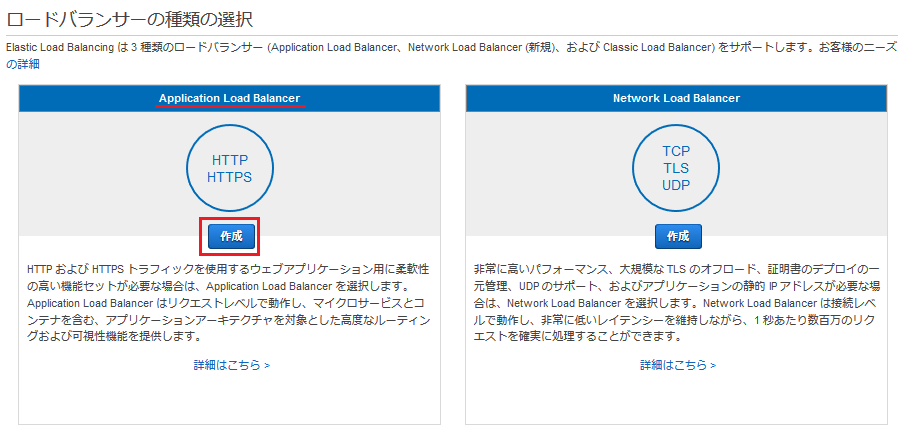
ALB(Application Load Balancer)を選択します。
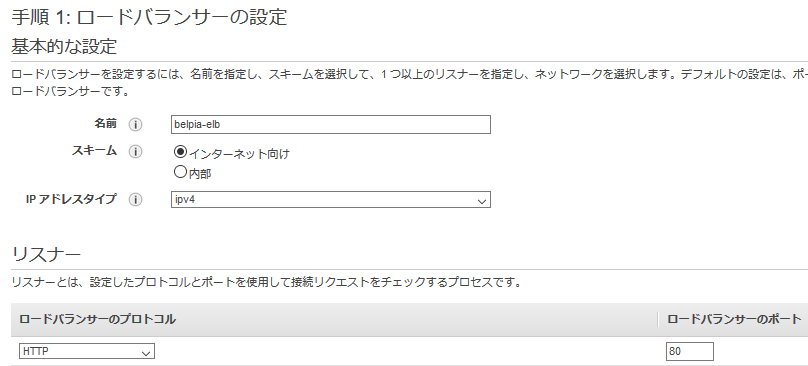
名前をbelpia-elbにします。
今回は外部からアクセスするHTTPをバランシングするので、
インターネット向けを選択します。
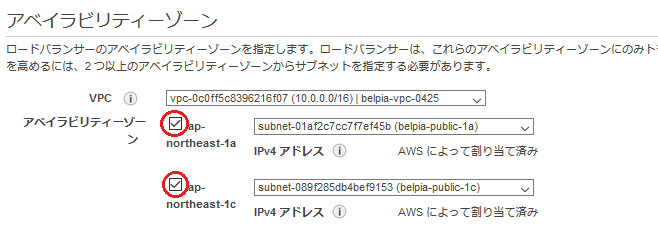
対象となるサブネット2つにチェックを入れます。

HTTPSでは無いのでこのような警告メッセージが出て来ますが、そのまま次へ進みます。
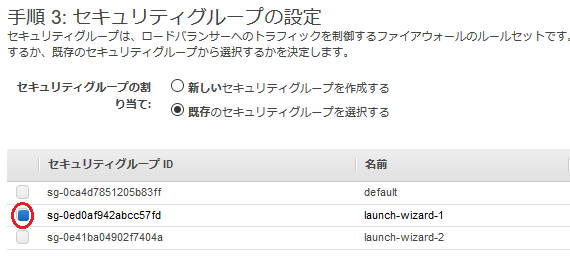
セキュリティグループを選択します。
ここではSSHとHTTPを許可する既存のセキュリティグループを割り当てています。
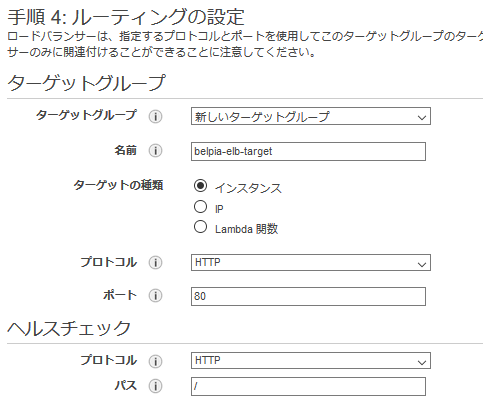
ターゲットグループを新規に作成します。
ここではインスタンスを指定します。
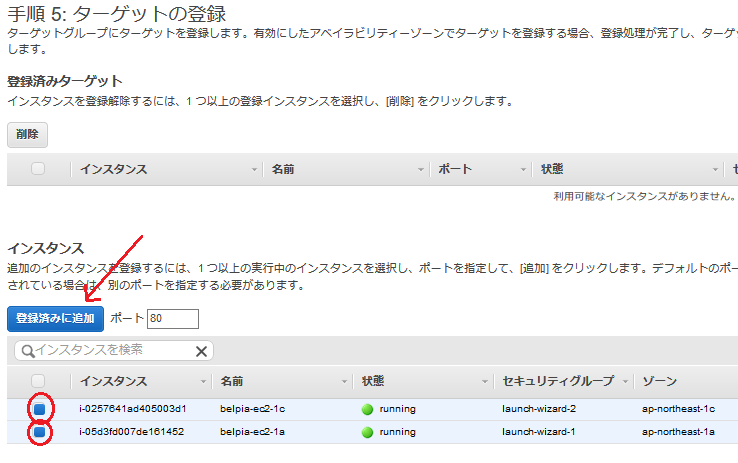
対象となる2つのEC2インスタンスにチェックを入れて、登録済に追加のボタンを押します。
これでELBの対象に追加されます。
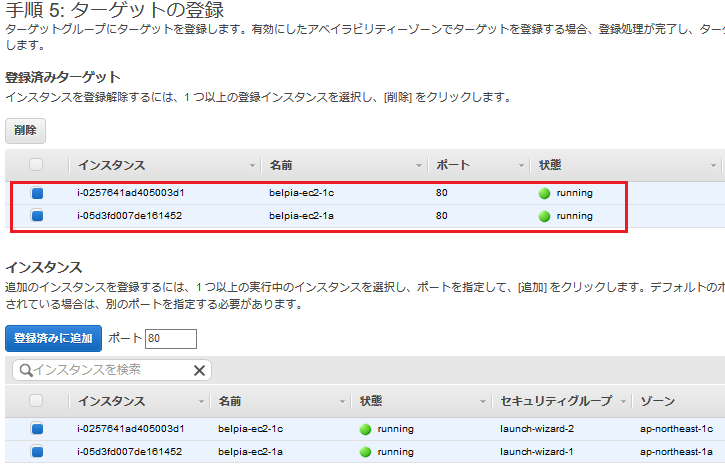
追加されると登録済みターゲットに表示されます。
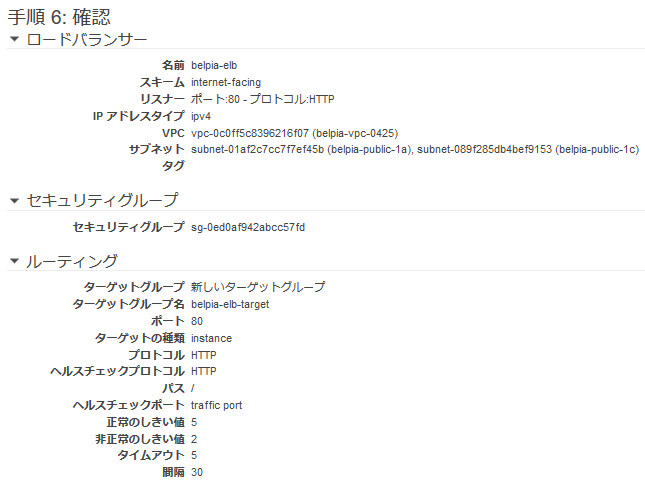
内容を確認して作成します。
ELBのバランシング機能を試す
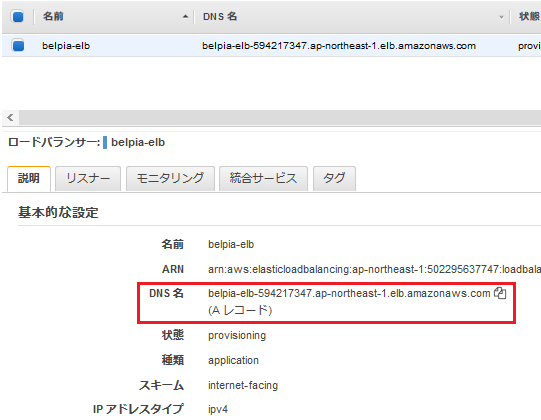
DNS名の部分がアクセス対象のアドレスになります。
★★ここは動画になっています★★
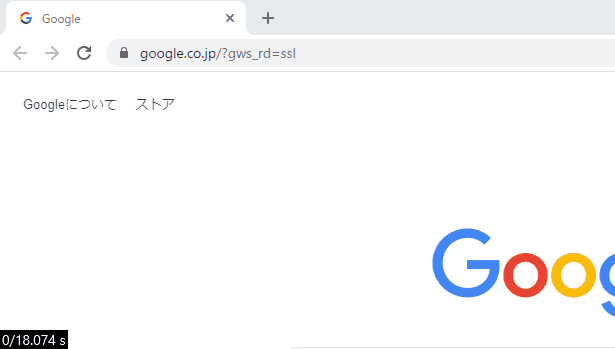
ブラウザのアドレスバーに先ほどのDNS名をコピペして何度かF5で画面を更新させています。
belpia-ec2-1aとbelpia-ec2-1cの両方のindex.htmlファイルの内容が表示されています。
設定してから数分経つまではアクセスエラーします。
ELBで対象インスタンスのステータスを確認する
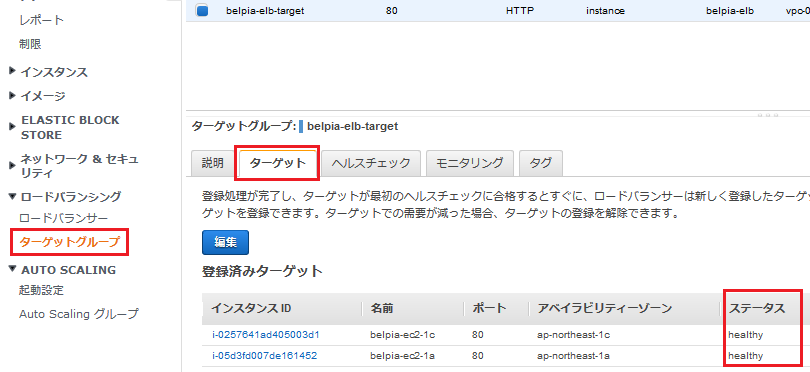
ターゲットグループの画面のターゲットタブで、対象のインスタンスの状態を確認することができます。
ここではノーマル(healthy)状態です。
ELBの動作を確認する
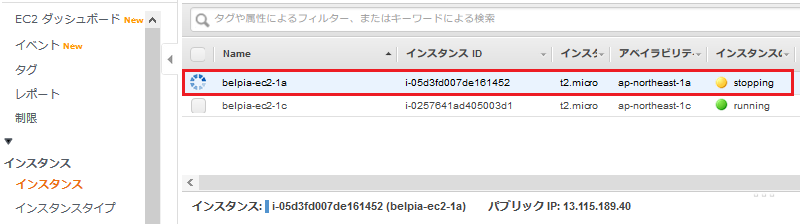
belpia-ec2-1aを停止させます。
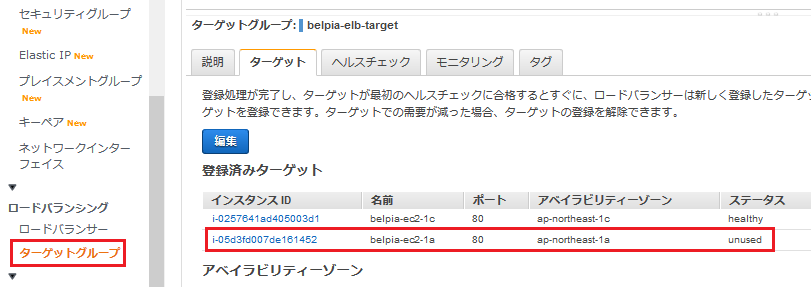
状態を見るとステータスがunusedとなります。
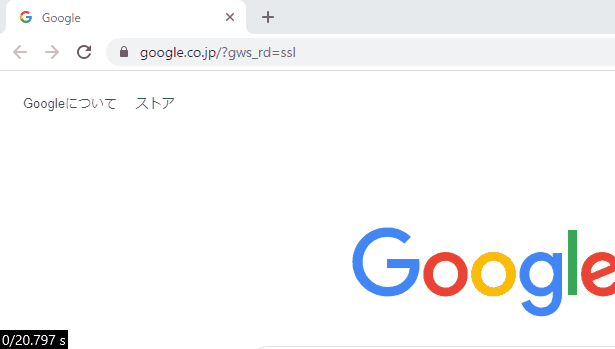
belpia-ec2-1cの内容のみ表示されることを確認します。
今回のまとめ
今回の内容はELB学習の中で最も基本的な内容です。
ELBを動かす前提のネットワーク作りが大半となっていましたが、
全体の流れを理解しながら設定するようにしましょう。